A PHP script to preview web design concepts in a browser
We've found that the best way to preview a web design concept is directly in an actual browser - we've put together a single PHP script to quickly and easily set up a browser based preview.
Over the years we've had several discussions with designers about how to accurately present visual design concepts for a website (or even a wireframe) to clients without there being confusion over scale or how designs will actually look in a browser.
Often designers will export mockups from InDesign or Illustrator and present them as a PDF - although PDFs are handy to attach to an email, there is a risk that when viewed they will be zoomed to something other than a 1:1. PDFs also often don't really explain what happens to the edges of a design and show how a design will sit in relation to a browser's viewport. Often cases of 'can our logo be bigger' are due to preview PDFs simply being viewed too small.
From these discussions we realised that a great way to present concepts to a client is directly in a browser, using a basic html file to centre the image. By placing design files on a web server we can easily send URLs via emails and Skype messages, but also make updates so there aren't multiple versions of a design floating around emails. We initially started off by creating a series of linked static HTML files to create such preview, but for larger jobs this became tedious. So instead we developed a single PHP script to automatically manage and provide navigation for a set of images.
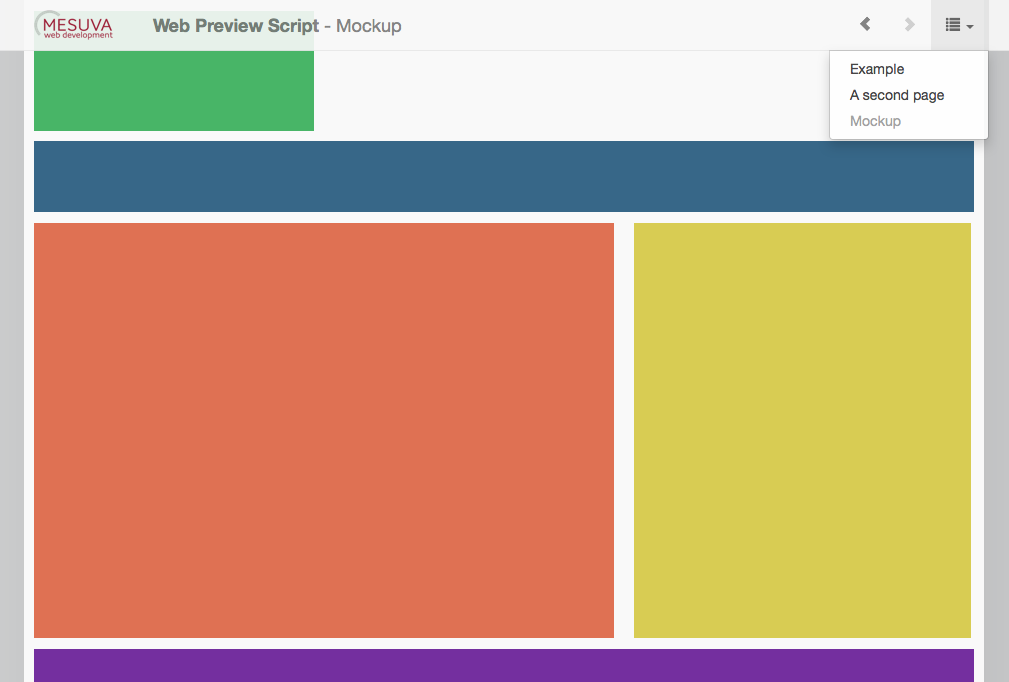
Our script automatically works out the height of the currently previewed image and places it centred in the browser as a background image - this means that someone viewing the image can resize their browser and see the image stretching to the sides, without scrollbars appearing.
We've used Twitter Bootstrap to quickly develop a simple interface, but also because these resources are available via CDNs, making it possible to package things up into a single PHP file.
Demo
Here's a quick demo of the script in action with a few test images.
How to use it
Simply drop the index.php file into a folder on a webspace and alongside it create a folder called images. In the images folder, drop a series of png or jpg files. The images can be any size, just keep in mind that they will centred in the browser when viewed.
Visiting the script in a browser will automatically display and link the files you've uploaded. To order the images, simply use file prefixes such as 01 - , 02 - , etc.
Although there are a few options in the script itself, the idea is that it can be used with zero configuration - upload the script and your images and it's done. The few options there are display at the very top of the index.php file.
Features at a glance
- Simply clicking anywhere on an image will advance to the next.
- An auto hiding navigation bar, with forward/back buttons and drop down image selector. The bar un-hides on mouse move.
- Images are ordered by filename, so prefixes such as 01 - , 02 - can be used, but these are automatically (optionally) removed in the display.
- Left and right keyboard keys can be used to navigate through the sequence.
- The ability to add a logo to the top left, simply edit the file and include a url. The script will force the height of the logo to the available space.
- By default the script uses the folder name it is in as the project title (in bold in the menu bar). This can either be overridden by manually entering in a project title or disabled.
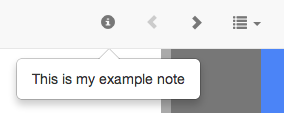 If a text file is also included in the images directory with the same name as an image file it will be made available as a note when that image.
- An embedded favicon to make finding its tab a little easier.
Download the script
The script (and demo files) can be found on github. Suggestions and improvements welcome!
-Ryan